Using the Admin UI
The Splinter Admin UI allows administrators to view circuit status and manage user profiles, circuit proposals, and circuits on a Splinter network.
This tutorial shows how to use the Splinter Admin UI with an example scenario
that creates a circuit between Alice at Acme Corporation and Bob at Bubba’s
Bakery. (See the
Gameroom Walkthrough
for more information about Alice and Bob.) This example uses Docker containers
that configure and start a node for each organization, acme-node-000 and
bubba-node-000, as well as an external database for each node and a single
external registry for node and key information.
As Alice, you will register as a new user and add user keys to your profile, then propose a circuit and view the proposal summary. As Bob, you’ll register and add keys, vote on the circuit proposal, then view the new circuit’s summary. Finally, you’ll log out for both Alice and Bob.
Prerequisites
- A clone of the splinter-ui repository
- Docker Engine
- Docker Compose
Starting the Admin UI with Docker
-
In a terminal window, navigate to the root of the
splinter-uirepository. -
Start the Docker containers with the following command.
docker-compose up --build -
Wait until the build completes and the containers have started. The output will end with messages that resemble this example:
 .
 .
 .
 splinterd-beta              | [2020-06-29 17:38:25.708] T["actix-rt:worker:0"] INFO [actix_web::middleware::logger] 172.19.0.5:36240 "GET /status HTTP/1.1" 200 219 "-" "curl/7.58.0" 0.000129
 splinterd-alpha             | [2020-06-29 17:38:25.745] T["actix-rt:worker:1"] INFO [actix_web::middleware::logger] 172.19.0.5:50672 "GET /status HTTP/1.1" 200 222 "-" "-" 0.000056
 generate-registry_1         | Added node 'alpha-node-000' to '/registry/registry.yaml'
 splinterd-beta              | [2020-06-29 17:38:25.770] T["actix-rt:worker:1"] INFO [actix_web::middleware::logger] 172.19.0.5:36244 "GET /status HTTP/1.1" 200 219 "-" "-" 0.000053
 generate-registry_1         | Added node 'beta-node-000' to '/registry/registry.yaml'
 docker_generate-registry_1 exited with code 0
Docker starts two versions of the Admin UI, one for each node. The Admin UI for
alpha (alpha-node-000) is at localhost:3030. The UI for beta
(beta-node-000) is at localhost:3031.
Logging In or Registering
-
For Alice, open a browser and go to
localhost:3030. The Log In dialog displays.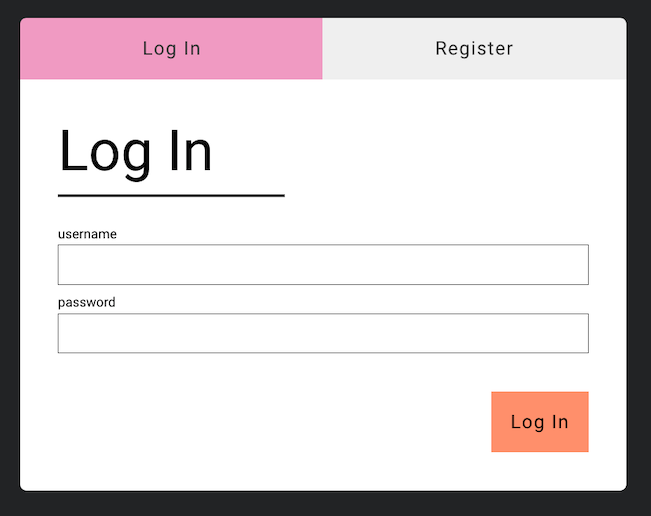
-
To register Alice as a new user, click Register, then enter a new username (such as
aliceoralice@acme.com) and password.
-
Next, the main Admin UI page displays.

NOTE: To repeat this procedure for Bob, open a new browser window and go to
localhost:3031. Then use the same steps to register Bob as a new user.
Adding User Keys
After registering a new user, add the user’s public and private keys.
-
Get Alice’s keys from the Splinter registry, which is available in the
generate-registrycontainer.a. In a separate terminal window, navigate to the root directory for
splinter-ui, then open a bash shell in the container:docker-compose run generate-registry bashb. Display Alice’s public and private keys:
root@9739a96d4f2a:/# cat /registry/alice.pub 03ae67a60aacd6db99c851119204c81914c97bc231c79af9a22a2cb78f25218383 root@9739a96d4f2a:/# root@9739a96d4f2a:/# cat /registry/alice.priv 12f5463fcf7525363cacaad7b7aba4e8f182ec38942f7a74678bdf6fdfab050a root@9739a96d4f2a:/# -
On the main page, click the profile icon in the left menu. The Profile page appears.
")
-
On the Profile page, click the orange + icon to display the Add key dialog.
-
In the Add key dialog, enter a key name (such as
alice), then copy the key values from thegenerate-registryterminal window and paste them here.Tip: Do not press Enter or Return after pasting a key value.

-
Click the Next button, then enter Alice’s password and click Submit.

If the operation was successful, the Profile page displays Alice’s public key. At this point, it is an inactive key. The Admin UI can store multiple key pairs for each user, but one key pair must be marked as active.
-
To make Alice’s key active, follow these steps.
a. Hover over the key, then click Set active.

b. Enter Alice’s password when prompted.
c. If the operation was successful, the key is now marked as Active.

NOTE: To repeat this procedure for Bob, use a separate browser window that points to
localhost:3031. In thegenerate-registrycontainer, Bob’s keys are available in the files/registry/bob.puband/registry/bob.priv.
Proposing a Circuit
-
As Alice, click on the Circuits icon in the left menu. The Circuits page displays a summary of existing circuits and proposals. In this example, nothing exists yet.

-
Click Propose New Circuit. The Add nodes form shows the nodes that are available for the circuit, with the local node (
acme-node-000) preselected. Select the checkbox for Node beta-node-000, then click Next.
-
On the Add services form, enter the following service information for the alpha node.
Item Value Service type scabbardService ID abcdAllowed node alpha-node-000Service argument Key: admin_keysValue: ["<Alice's public key>"]Service argument Key: peer_servicesValue: ["fghi"]Tip: To add a second service argument, click the small + icon on the right.

-
Click the green check to submit alpha’s service information. If the operation was successful, the green check changes to a pencil (edit) icon.

Otherwise, an error displays so you can correct the information and resubmit it.
-
Click the pink + icon at the bottom of the form to add another service form, then enter the service information for the beta node.
Item Value Service type scabbardService ID fghiAllowed node beta-node-000Service argument Key: admin_keysValue: ["<Alice's public key>"]Service argument Key: peer_servicesValue: ["abcd"]Note: You must use the same key (or the same set of multiple keys) for all services on a circuit.

-
Click the green check to submit beta’s service information.

-
Review the service information for both nodes, then click Next.
-
On the Add circuit details form, enter
gameroomas the circuit management type, and enter an optional comment if you would like. Then click Next.
-
On the Add application metadata form, you can specify application-specific information (optional), then click Next.
This example specifies a JSON-format alias for the circuit.

-
On the Review and submit form, carefully check the circuit proposal. If necessary, use the Previous button to go back and fix incorrect information.

-
When you’re sure the circuit proposal is correct, click Submit. If the proposal is valid and is submitted successfully, the Circuits page displays a notification and a summary of the proposed circuit (after a few seconds).

Otherwise, the notification displays an error with information about the problem. The error is also displayed as a log message in the terminal window running
docker-compose.
Viewing a Circuit Proposal
-
To view the Circuits page (if not already displayed), click the Circuits icon in the left menu.
-
The Circuits page shows all circuits and proposals. In this example, Alice sees one proposed circuit that is awaiting approval from Bob.

-
To view the proposal details, click on the proposal summary. The circuit detail page shows information about each node in the circuit.

-
To see even more information, click on a node. The page expands to show service details for the node.

Voting on a Circuit Proposal
As a user on the other node, Bob must vote to accept or reject the proposal.
-
To view Bob’s version of the Admin UI, open a browser and go to
localhost:3031. -
If Bob is not already logged in, register Bob as a new user (see Logging In or Registering), then add Bob’s user keys and mark them as active (see Adding User Keys).
-
To display the Circuits page, click on the Circuit icon. Notice that Bob’s view includes “Action required” and “Awaiting approval” notifications because his vote is needed.

-
Click on the proposal summary to see details of the proposed circuit. For Bob, this page displays a Vote on proposal button.

-
Click Vote on proposal to display the Vote on circuit proposal dialog. Review the circuit details, then select either Accept or Reject to submit a vote.
In this example, Bob eagerly accepts the proposal.

-
After Bob’s approval, the circuit detail page displays a notification that the vote was submitted successfully. (If Bob had rejected the proposal, the main Circuits page would display an empty list with no proposals or circuits.)

-
After a short delay, the circuit is created. The circuit detail page no longer shows “action required” notifications at the top or in the Status column.

-
Likewise, the main Circuits page shows the new circuit in place of the proposal.
")
-
From Alice’s browser window (at
localhost:3030), the main Circuits page also displays the new circuit.")
Logging Out
-
Click the profile icon to display the Profile page.
-
Click Actions (in the upper right).

-
In the drop-down menu, click Logout.

Stopping the Demo
-
To stop the demo, enter CTRL-C in the terminal window where you ran
docker-compose up, and wait for a graceful shutdown.registry-server | 172.24.0.7 - - [29/Jun/2020:22:59:02 +0000] "GET /registry.yaml HTTP/1.1" 200 458 splinterd-alpha | [2020-06-29 22:59:02.326] T["reqwest-internal-sync-runtime"] DEBUG [reqwest::async_impl::client] response '200 OK' for http://registry-server/registry.yaml splinterd-alpha | [2020-06-29 22:59:02.327] T["Remote Registry Automatic Refresh: http://registry-server:80/registry.yaml"] DEBUG [splinter::registry::yaml::remote] Automatic refresh of remote registry 'http://registry-server:80/registry.yaml' successful ^CGracefully stopping... (press Ctrl+C again to force) Stopping registry-server ... done Stopping splinter-db-beta ... done Stopping splinter-ui-beta ... done Stopping splinterd-beta ... done Stopping splinter-db-alpha ... done Stopping splinter-ui-alpha ... done Stopping sapling-dev-server-beta ... done Stopping splinterd-alpha ... done Stopping sapling-dev-server-alpha ... done -
To remove the Docker containers (including all user and circuit information), run the following command:
docker-compose down --volumes